
Welcome to my "Olive" experiment. The one thing I love to do is experiment with food and ingredients. Years ago, I read that the texture of unripe green plums is similar to that of olives. So, why not create an olive alternative by curing and pickling them? I have attempted this with unripe green wild plums and damsons, and both have worked really well, producing a satisfying and unusual alternative to olives.
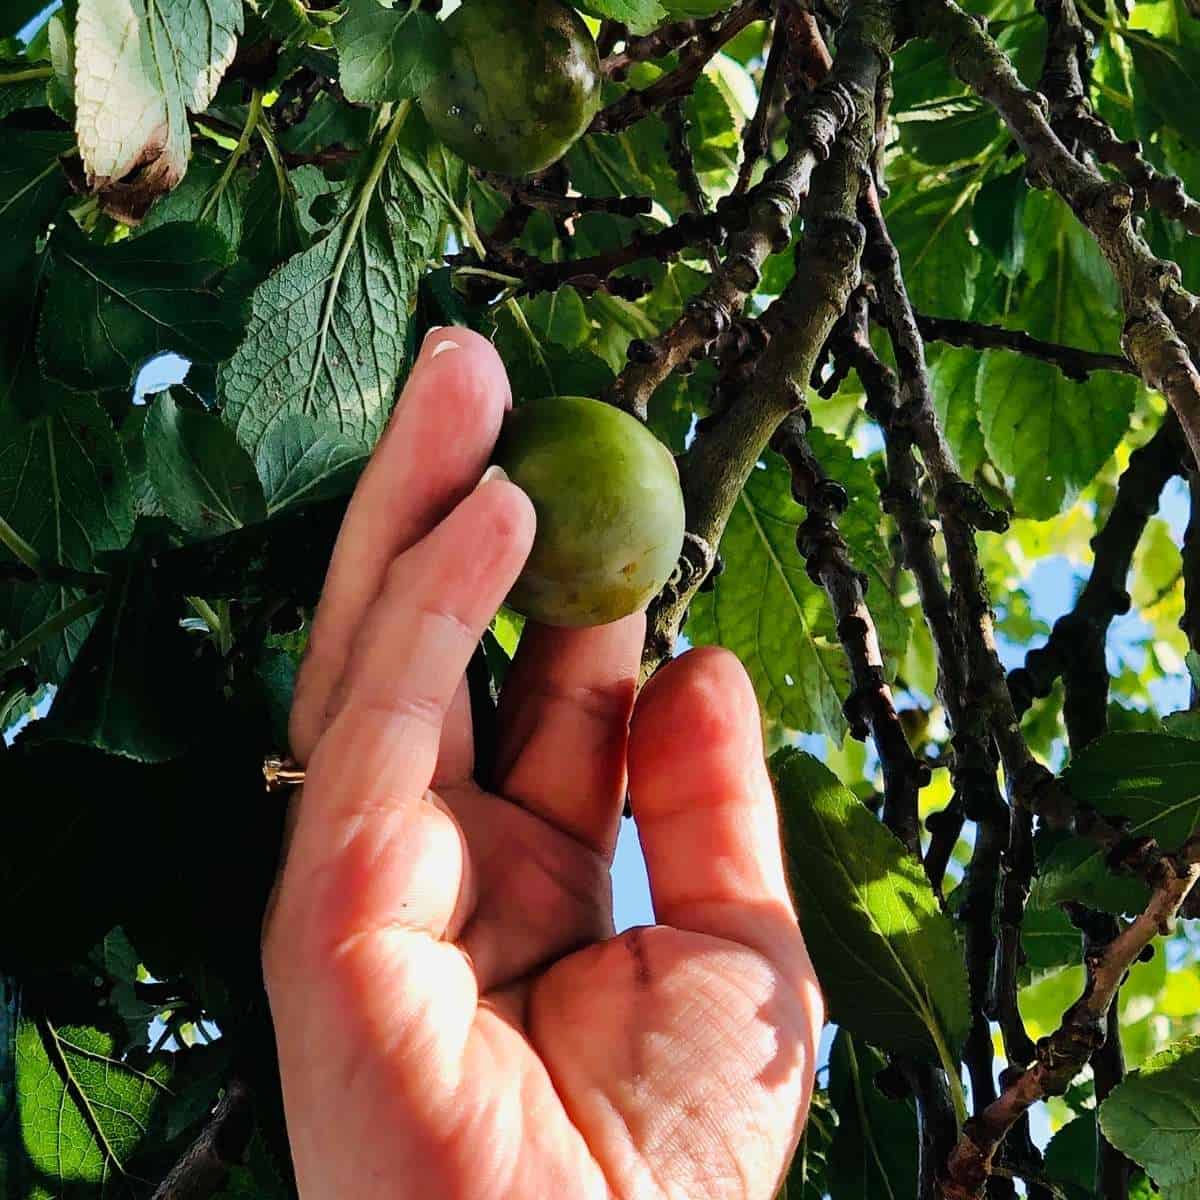
At this time of year in the UK (late spring/early summer), you will see plum trees full of unripe, green plums, perfect for this experiment. So a ready supply of free ingredients.
You will need a bit of patience; the process of curing and pickling takes a few months. Good things come to those who wait, though.
If you like pickled foods then try my pickled walnuts and pickled red onion recipes.
Jump to:
Ingredients
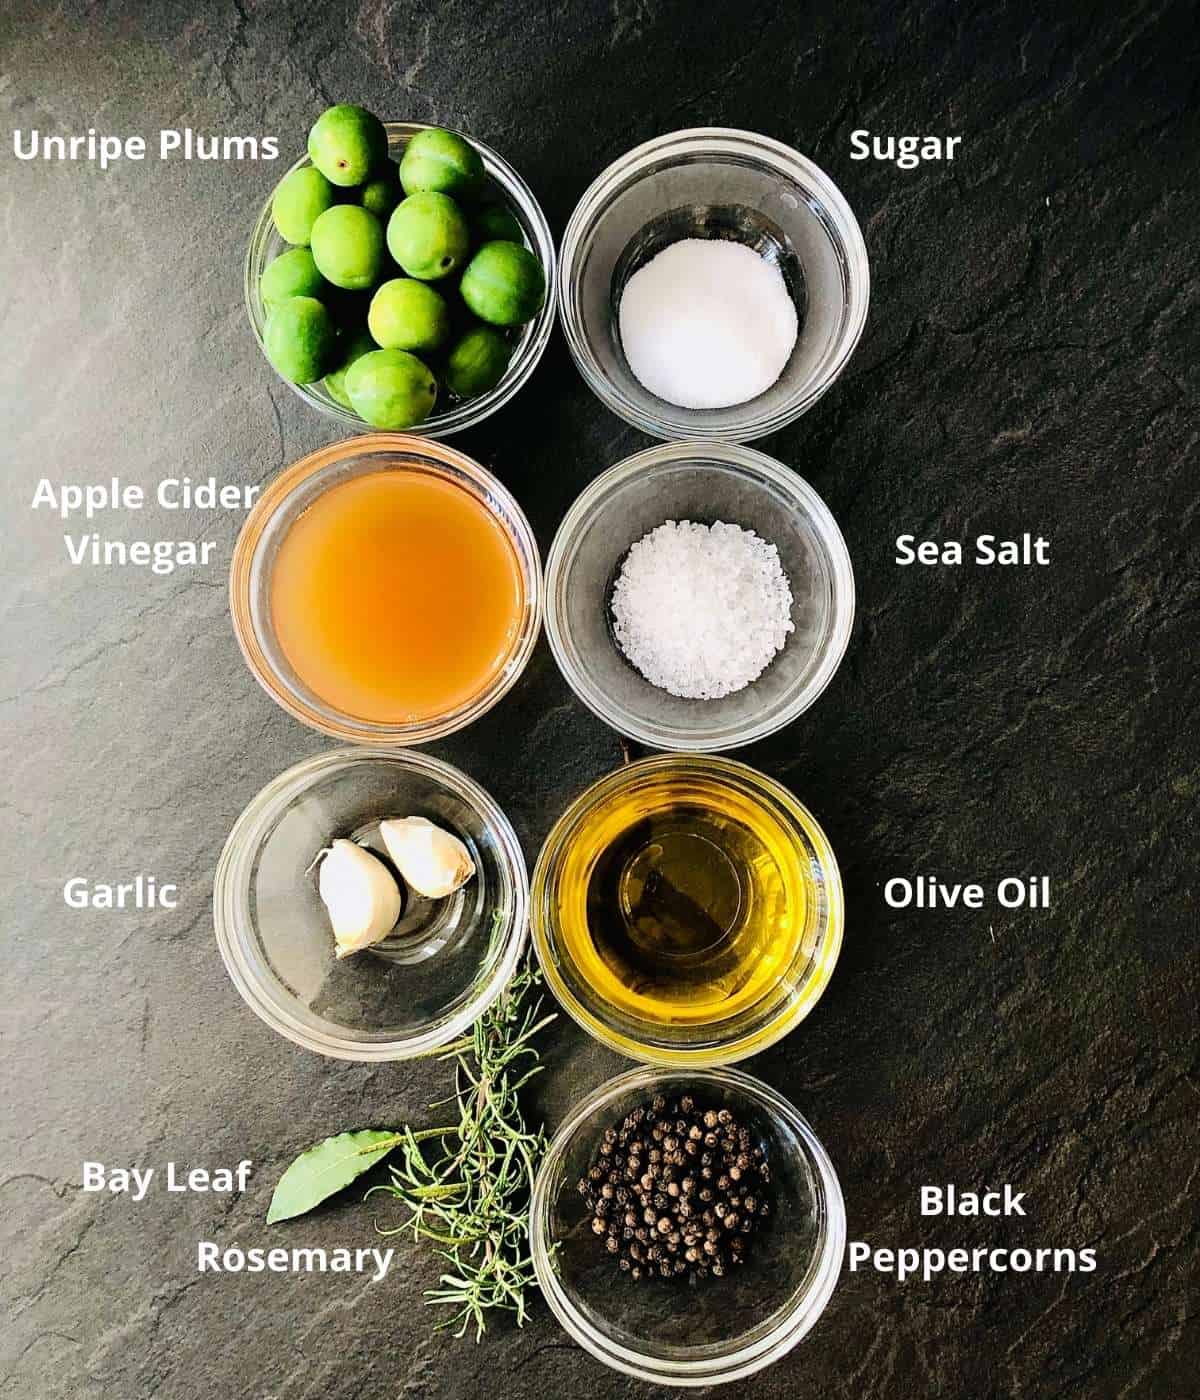
Brine
- Coarse salt
- Water
Pickling Liquid
- Apple cider vinegar
- Sea salt
- Black peppercorn
- Bay leaf
- Rosemary
- Sugar
Marination
- Olive oil
- Rosemary
- Garlic
See the recipe card for quantities.
Instructions For Making Pickled Green Plums
First, go out and pick some unripe wild plums. They are common here in the UK. Be sure to correctly identify a plum tree before you harvest any fruit. Never eat anything you are not 100% confident you have identified correctly.
Curing The Unripe Plums In Brine

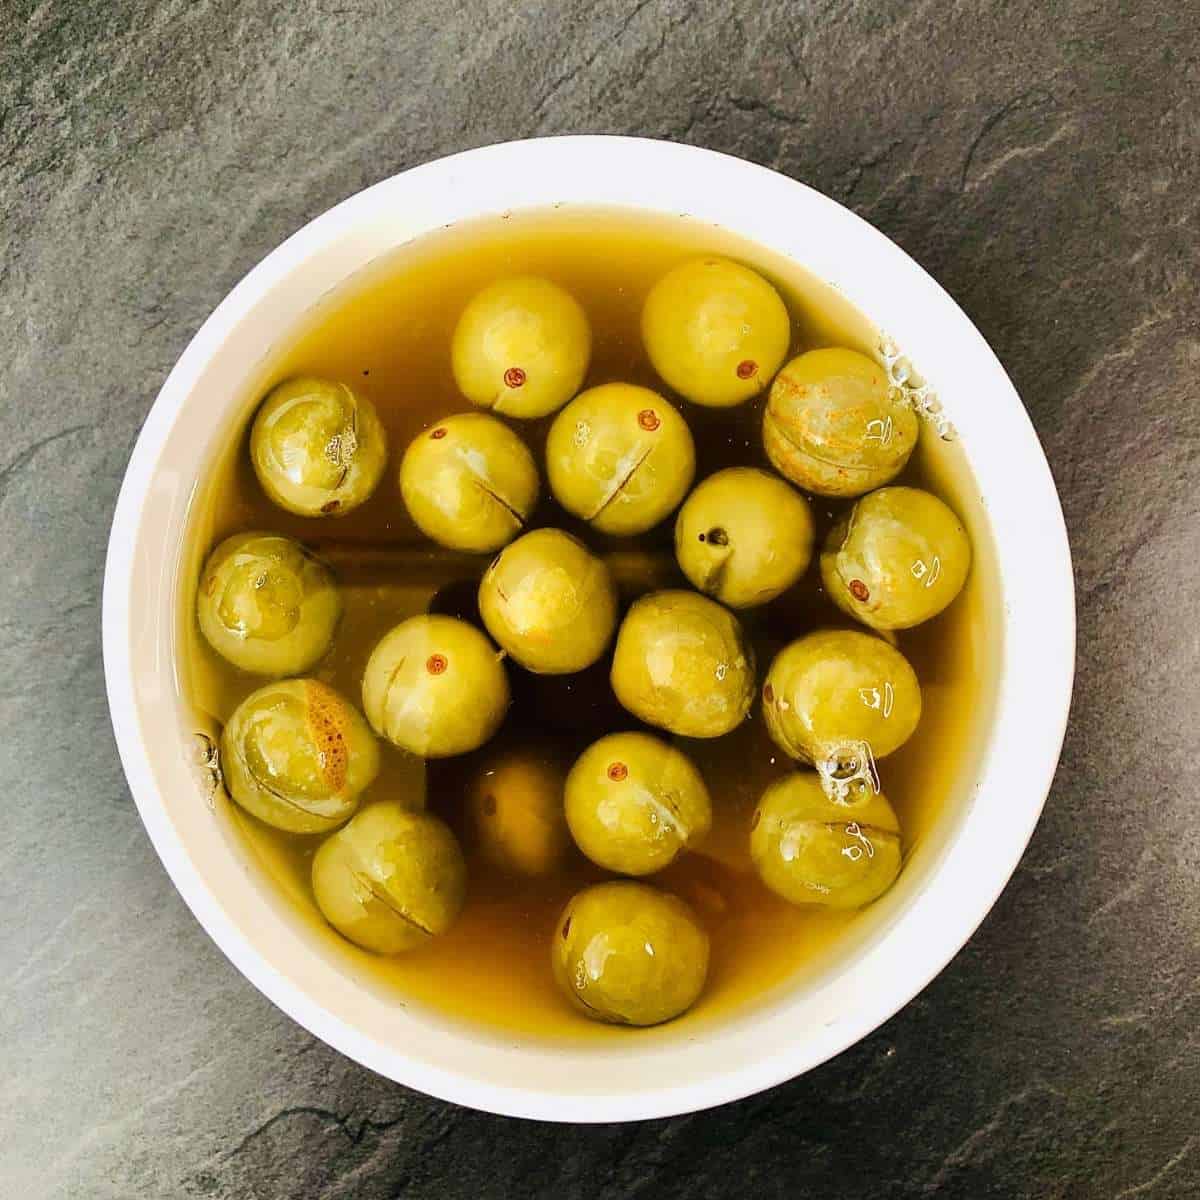
Wash and pat dry the plums. Score the plums on one side so that the brine can penetrate. Pack the scored plums tightly into a suitable sterilised jar.
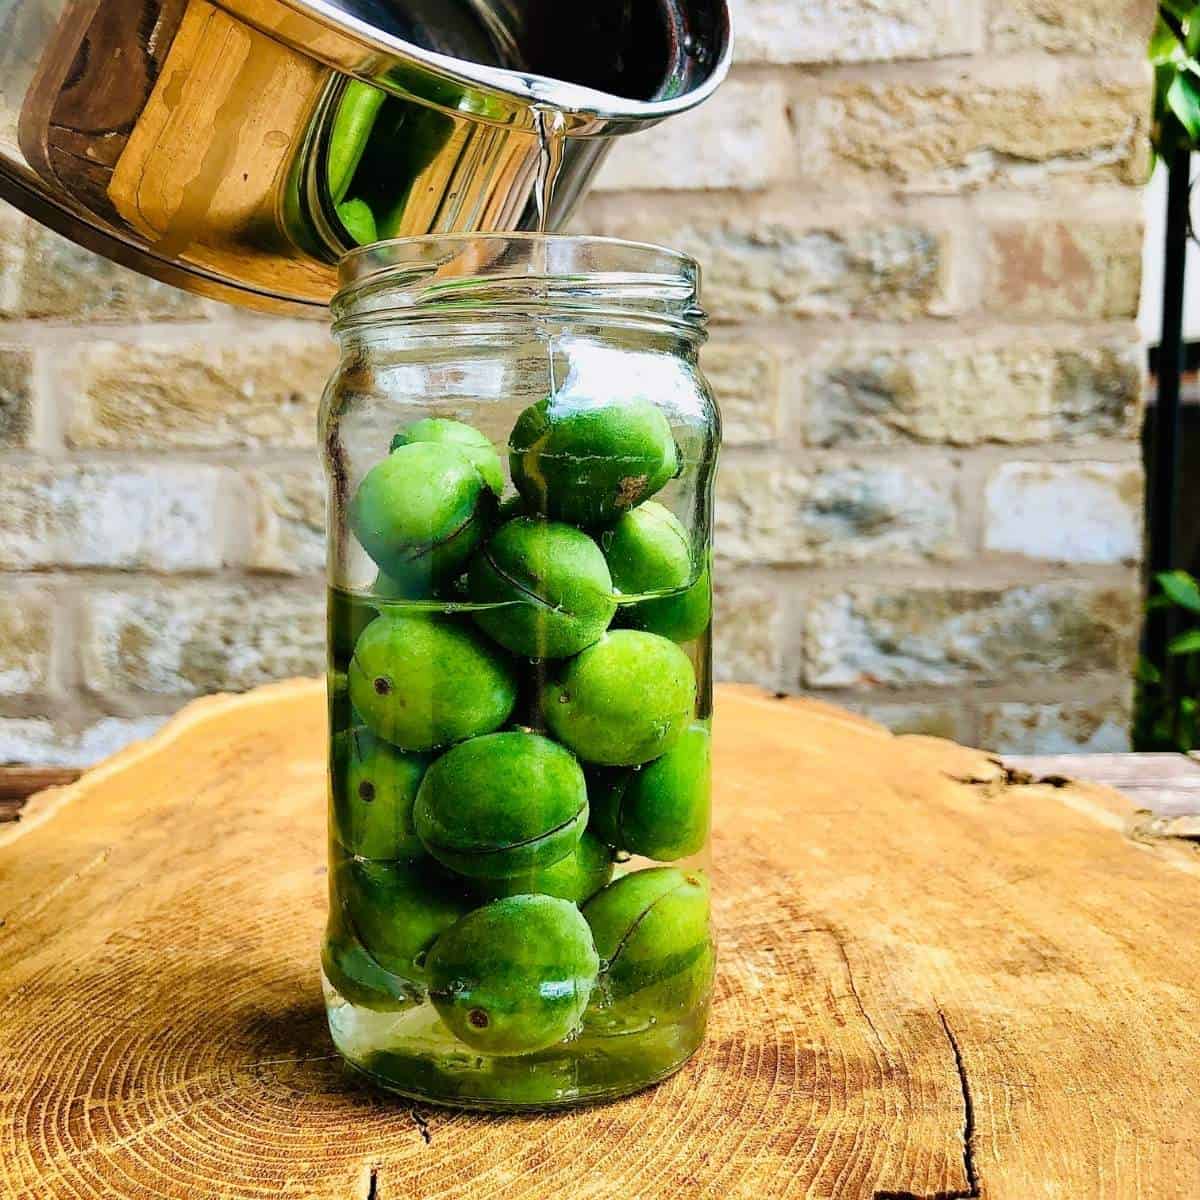
Make the brine: Bring the water to a boil in a saucepan and add the salt. Please do not use table salt for the brine. When the salt has dissolved, remove it from the heat and let it cool.
When cooled, pour the brine into the jar containing the plums. Seal the jar with a lid and store it in a cool dark place for a week.
After a week, drain the brine. Make a fresh batch of brine and sterilise the jar again. Place the plums back into the jar and pour in the fresh brine. Seal the jar and store it in a cool, dark place for one month.
After a month, again drain the plums, sterilise the jar and make a fresh batch of brine. Replace the plums in the jar and store them in a cool dark place for the final two months.
Altogether, that is three months of curing in brine.
Pickling The Cured Plums
After these three months of curing, now it is time to pickle.
Add apple cider vinegar, salt, sugar, bay leaf, peppercorns and rosemary to a pan and bring to a rapid boil.
Once the sugar and salt have dissolved, remove from the heat and allow to cool.
Drain the brine from the cured plums and transfer the plums into a bowl. Submerge the plums in the pickling liquid for 24 hours.
Marinating The Cured, Pickled Plums
After 24 hours in the pickling liquid, drain the plums.
Sterilise the jar in which you intend to store the pickled plums.
Peel and slice the garlic and wash and dry the rosemary.
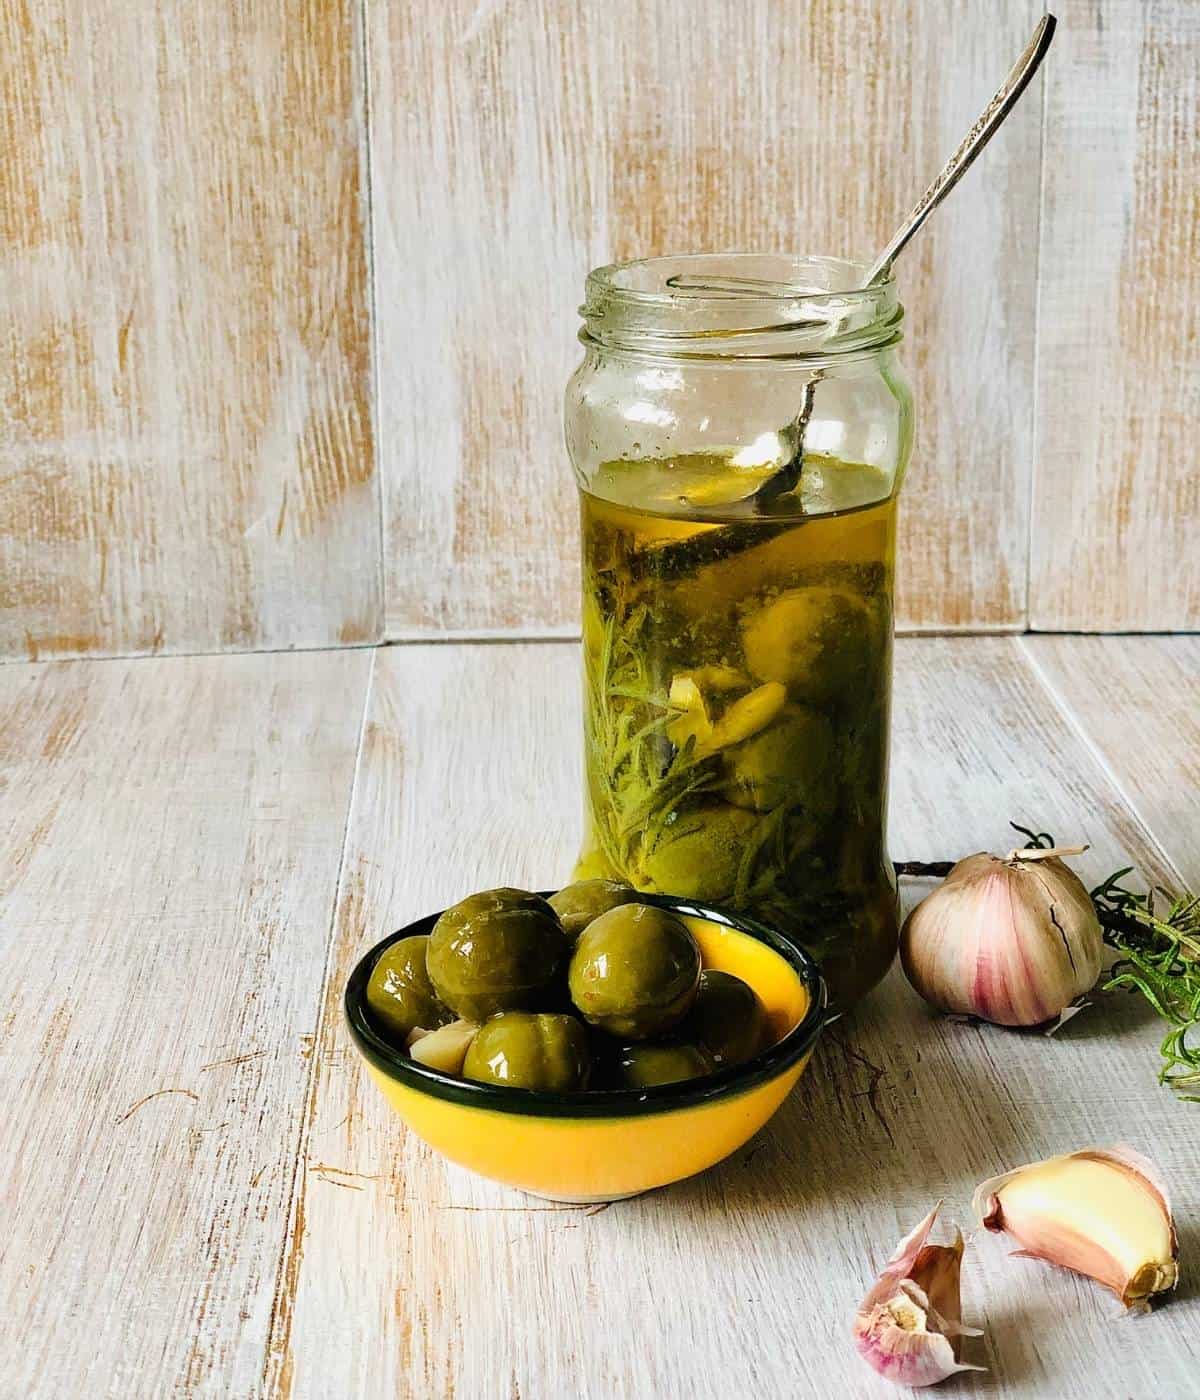
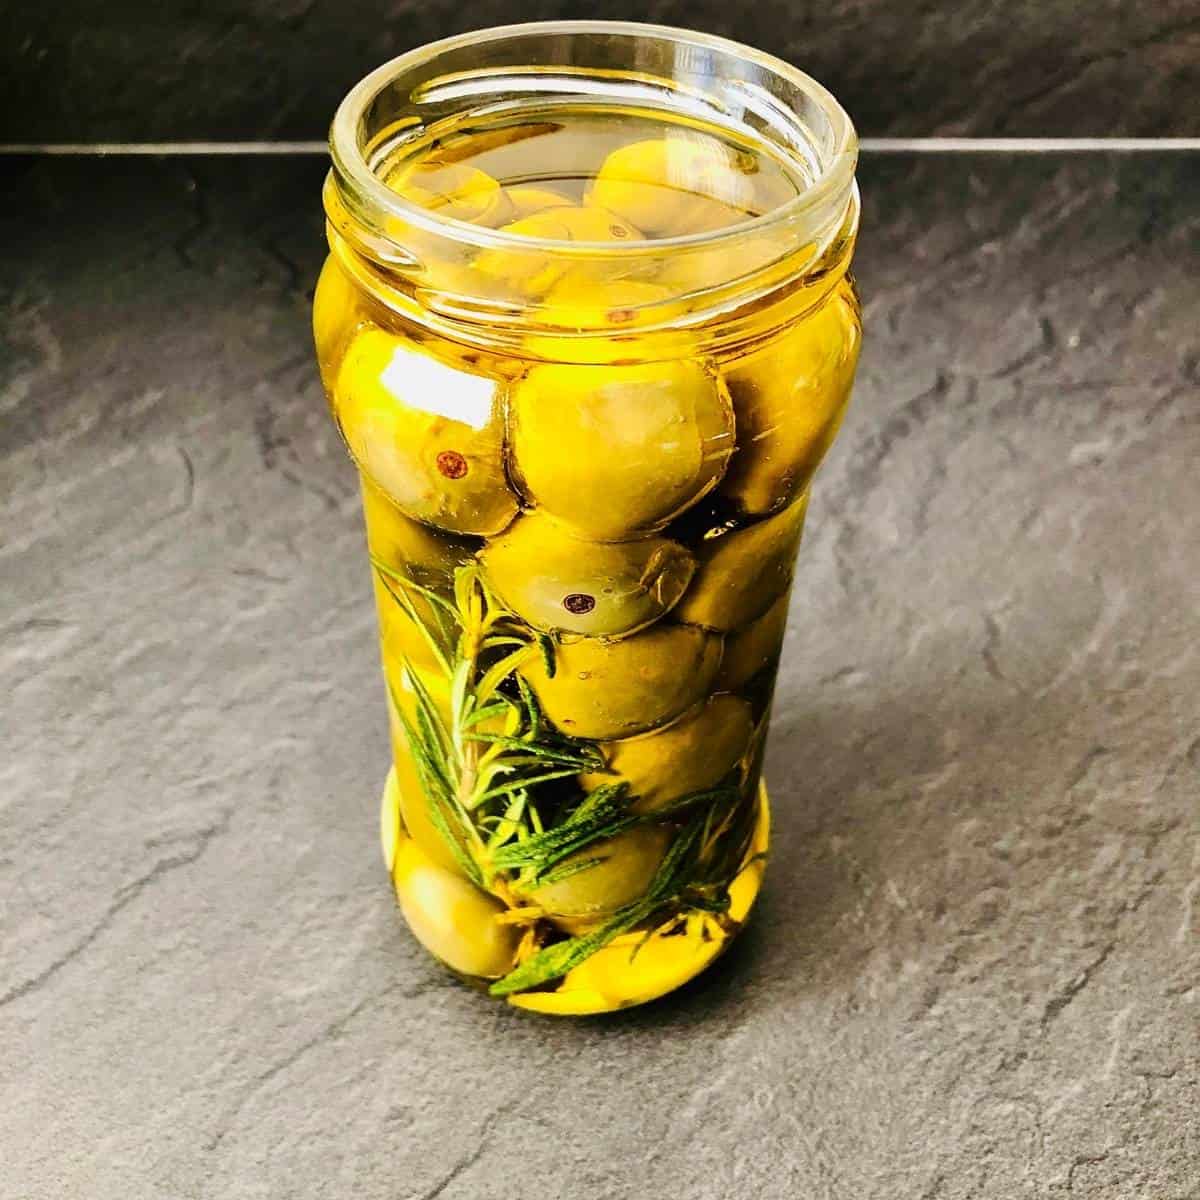
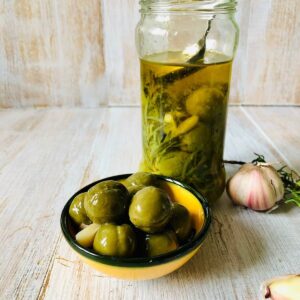
Place some of the pickled plums into the sterilised jar, and then add some slices of garlic and some rosemary. Add some more of the plums; follow this with more pieces of garlic and some rosemary. Repeat this process until you fill the jar. Finally pour in the olive oil until all of the olives are submerged. Seal the jar with the lid.
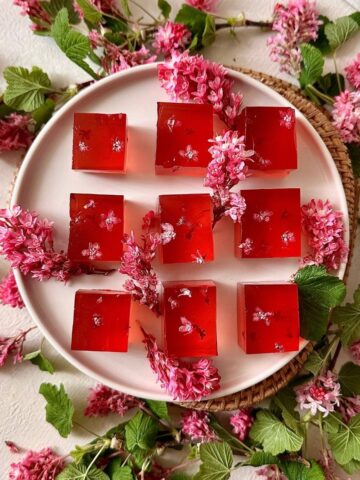
Store the jar in a cool, dry place for three weeks. After three weeks, the pickled plums are finally ready. Use it as you would use olives: in pasta, dips and even as nibbles.
How-To Video
Here is a video guide to making green pickled plums.
Substitutions
You can use white wine vinegar instead of apple cider vinegar for the pickling liquid.
Instead of rosemary, you can use thyme for the pickling liquid and the marination.
You can use your creativity in terms of the flavour you want for your olives in the marination.
Variations
I have used this same method to pickle damsons once they have ripened enough, as in changed their colour, but are still quite firm, and it works just as well.
Equipment
Reuse your old jam jars!
Glass weights are handy to keep the plums submerged in the brine/pickling liquid, or you can also use a sterilised small glass bowl.
Storage
An essential task to ensure that the pickled plums stay good for as long as possible is to sterilise the glass jars you will keep the plums in during the curing and storage. Sterilise the jars by washing them in warm soapy water and then placing them in an oven at 100ºC for thirty minutes.
Once the plum olives are pickled and marinated, they will store in the fridge for three months. Make sure the plums are always covered with olive oil and use a clean, dry spoon each time you take some plum olives from the jar.
Top tip
Make sure to sterilise the bottle and all equipment used each time you change the brine. If you don't, then mould may grow during the curing process.
The plums must be tightly packed in the bottle to avoid floating. If not submerged in the brine, there is a chance they may go mouldy. You can also use weights that fit inside the bottle to keep them from floating. Make sure the weights are sterilised though.
The best way to judge how much brine you will need is to put the plums in the jar you intend to use and add water before you start. The amount of water you add is the amount of brine you need.
For your reference, the ratio for the brine is 12 gms of coarse salt for every 250ml of water.
📖 Recipe
Curing And Pickling Unripe Green Plums like Olives
Equipment
- Jam jar
Ingredients
- 20 Green, unripe plums
Brine
- 12 gms Coarse sea salt
- 250 ml Water
Pickling Liquor
- 250 ml Apple cider vinegar
- 1 teaspoon Sea salt
- 6 Black peppercorns
- 1 Bay leaf
- Rosemary 1 sprig
- 1 tablespoon Sugar
Marination
- 250 ml Olive oil
- 1 sprig Rosemary
- 2 cloves Garlic
Instructions
- Wash, pat dry, and score the green, unripe plums.
- Pack them tightly into a sterilised jam jar.
Curing In Brine
- Add the water and coarse sea salt into a pan and bring to a rapid boil. Once the salt has dissolved, remove from heat and set aside to cool.
- Pour the brine into the jar packed with plums and seal shut.
- Store the jar in a cool dark place for a week.
- After a week, drain the plums.
- Make fresh brine and sterilise the jar.
- Once again, pack the plums into the jar and pour in the cooled brine. Store in a cool dark place for a month.
- After a month, drain the brine.
- Make fresh brine and sterilise the jar and pack the plums in the jar once again.
- Pour the new brine into the jar and store it in a cool dark place for two months.
Pickling In Pickling Liquid
- Add apple cider vinegar, salt, sugar, bay leaf, peppercorns and rosemary to a pan and bring to a rapid boil.
- Once the sugar and salt have dissolved, remove from the heat and allow to cool.
- Drain the brine from the plums and transfer the plums into a bowl. Submerge the plums in the pickling liquid for 24 hours.
Marinating the Pickled Plums
- Drain the pickling liquid. You can use this for salad dressings or roasting veggies.
- Sterilise the jam jar.
- Peel the garlic and slice. Wash and dry the rosemary sprig.
- Add a few pickled plums into the sterilised jar, then add a few slices of garlic and rosemary. Again, add a few more plums followed by garlic slices and rosemary. Repeat this until the jar is full.
- Now pour in the olive oil and seal shut.
- Store in a cool, dry place for three weeks.
- After three weeks, the pickled plums are ready for use.
- Once the jar is opened, refrigerate.
Food Safety
- Wash your hands regularly while preparing, handling and cooking food.
- Wipe down countertops and high-contact points regularly.
- If you cook meat and fish, do not use the same utensils on cooked food that previously touched raw meat. Use separate chopping boards for meat and fish. Wash your chopping boards immediately after use.
- Thoroughly cook food to a minimum temperature of 165 °F (74 °C).
- Don't leave food at room temperature for extended periods (more than 2 hours).
- Store food correctly.

Hélène says
That's one of the best thing I've ever tried! Hundred stars for that recipe. Bravo!
Chef Tripti says
Thank you so much! Please also try the pickled walnuts - they are soon to be at the stage in their growth ready for pickling!
Géraldine says
The plums look amazing!! I just made them now I wait for the first brine replacement 🙂
Would it be possible to eat them after the pickling process? Or is the marination indispensable? The taste must be different but maybe still nice?
Chef Tripti says
Thank you!
You can eat after brining, however it doesn't have too much flavour, the marination process adds to the taste and texture.
Do let me know if you liked it without marination.
Rob Morgan says
Hi,
I’ve just started with this, but have a question. Why do you have to swap out the brine? Surely this is lacto fermentation in an anaerobic environment. The LAB, to my understanding destroys harmful bacteria. As with most things, I could be wrong.
Thank you for any explanation.
Rob
Chef Tripti says
Hello there! Thank you for trying out the recipe. To be honest, this is just the way I have learned. I understand changing the brine helps with removing the bitterness from the green unripe plums. The process is similar to how you would cure green olives. I hope this helps.
Rob says
Thanks for getting back to me. Much appreciated.
Heather says
Hi There
I followed your recipe and these turned out so delicious. I made a lot more than I can put in the fridge. Do you keep yours on the shelf and just refrigerate once opened. Curious to how shelf stable you have found these?
Cheers
Chef Tripti says
Hello Heather,
I am so pleased you liked it. I keep mine in the fridge, that way it is temperature controlled and lasts longer. I have eaten them beyond a year and they seemed okay.
Maria Smith says
Hiya
Do you know if these could be canned for long term storage. They sound amazing!
Thank you ☺️
Chef Tripti says
Hello Maria,
Thank you for your comment. I haven't tried canning them yet, however there is no reason why it shouldn't work. They do keep for a long time as long as they are submerged in olive oil and in the fridge.
Tripti
Gina says
Hi! I would love to try this recipe, but I would like to know, what level of unripeness can you start pickling the plums at? Right now I have a bunch that are around 3cm is that too small and unripe?
Chef Tripti says
Hello there!
My apologies for taking so long to respond. I had a medical emergency!
Usually I pick them in June, when they have had a bit of chance to grow, but are hard and green. I would say 2-3cm is good.
Let me know how you get along.
Tripti
J Wycliffe says
I'm so glad I found your website 💚
Some naughty cows snapped a big bough out of my plum tree, I was so upset as it's such a good year for plums.
I love olives so I'm now going to make these.
Thank you 💚
Chef Tripti says
Thank you for your lovely words!
I agree about it being a good year for plums- the plum tree at our little urban allotment is very heavy with plums this year.
It's amazing how "olive like" the pickled green plums turn out!
Might I suggest you try my crab apple butter a little later in the year? it is a fave of mine and there are some many crab apple trees dotted about my mother-in-laws village.
Samantha says
Hi there I just wondered if I can reuse the pickling liquid on another batch of plums as I have done so many?
Chef Tripti says
Hello Samantha,
To be honest, I haven't tried reusing, only because with pickling and storing things for a long time, there is always an aspect of introducing bacteria, which can cause spoilage. so I would recommend a new batch each time, unless you feel confident to experiment.
Hope this helps.
if you have enjoyed making my recipe, please do leave me a star rating, I would appreciate it very much.
Best
Tripti