
This crunchy sushi (well, it's not sushi, we are just using sushi rice) is a unique way to use leftover rice. It's a delicious, satisfying snack and perfect as finger food for parties. When I say crunchy sushi, I talk about sticky rice rolled, cut, and deeply fried. This crunchy sushi is comfort food! These fried rice squares look like they are coated in breadcrumbs; however, the crunchy exterior is deep-fried rice. The sushi rice is seasoned with rice vinegar, which helps it stick together to form the sushi rice cubes. I top the crunchy sushi rice with some smashed avocado mixed with soya sauce, lime juice and spring onions to give it an Asian flavour. If you need a canape idea, consider this recipe! Also, have a look at my san choy bao lettuce wraps. or my spiced pea tartlets.

You will need a sushi mat for this crunchy sushi receipt, or you can improvise with parchment paper or a silicone mat. I would recommend investing in a sushi mat, though, and it might also encourage you to learn how to make sushi.
Jump to:
Ingredients

- Japanese sushi rice
- Castor sugar
- Salt
- Spring onion
- Red chilli
- Avocado
- Lime juice
- Soya sauce
- Rice vinegar
- Oil for frying
See the recipe card for quantities.
Instructions
Rinse the sushi rice until the water runs clear.

Add the rice vinegar to a pan, and bring to a simmer. Add the salt and the castor sugar and continue to simmer until they have dissolved. Set aside.

Cook the rice: Add the water to a saucepan and then add the rice and cook on high heat for five minutes. Reduce the heat and simmer for five minutes. Finally, turn off the heat and let the rice cook for a final five minutes in its steam. When done, add the sushi vinegar, mix well, and set aside to cool. While it is cooling, finely chop the spring onions and the red chilli.

Now to roll the sushi rice: Have the bowl of water and sushi mat ready. Wet your hand, scoop out a handful of sushi rice, and place it in the middle of the sushi mat.
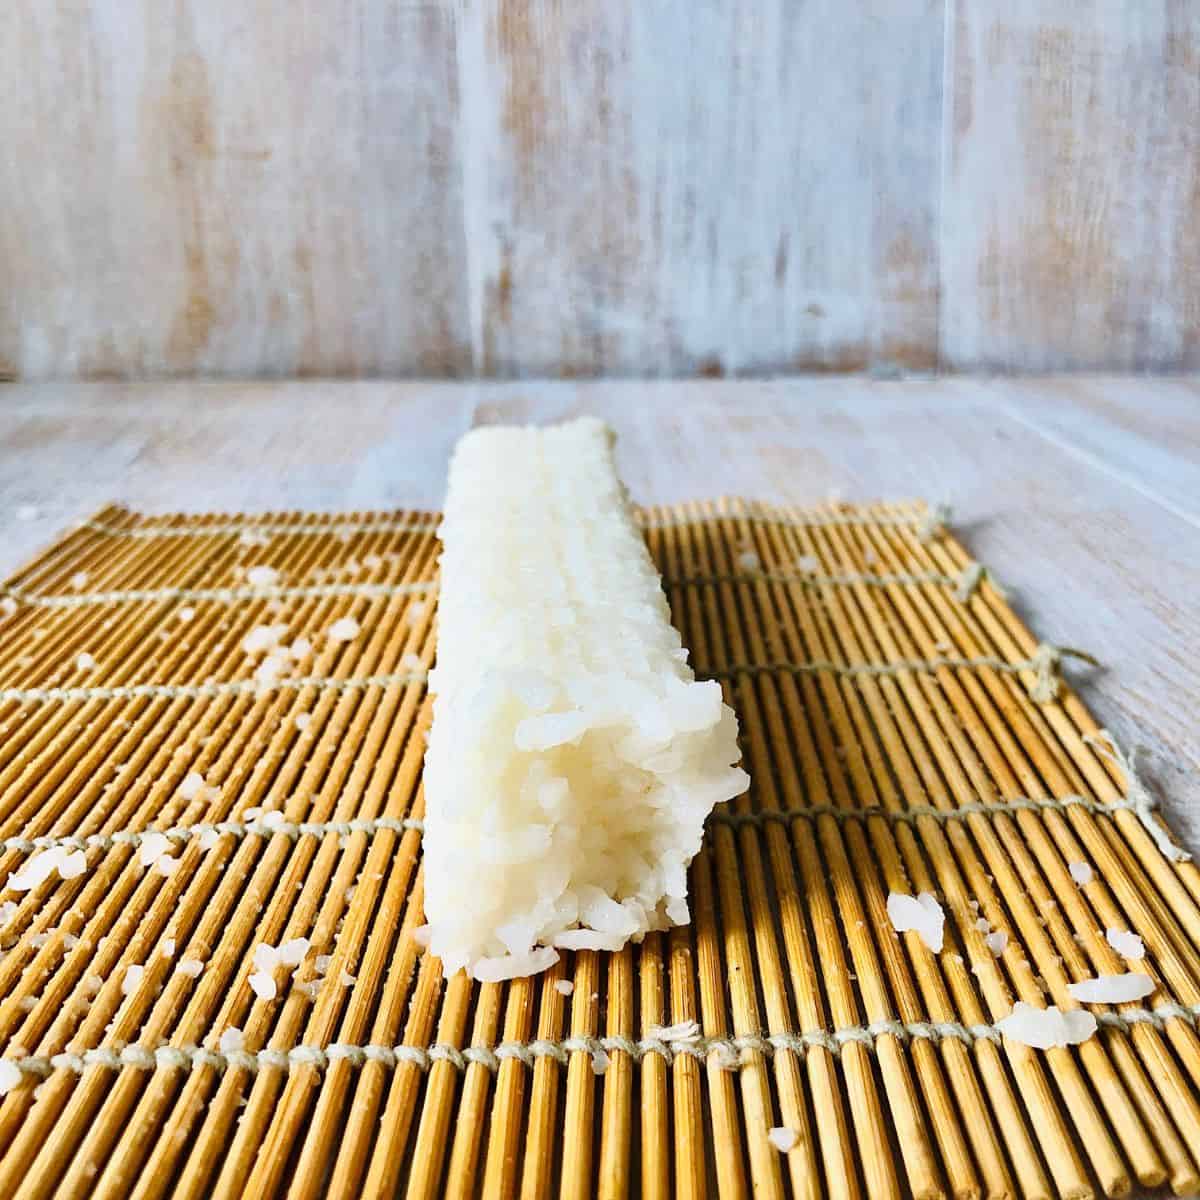
Roll the end of the mat (the end nearest to you) to cover the rice. Now pull the rolled-over mat towards you using both hands to form a rectangular shape. Use an equal amount of pressure while pulling. Press the rice inwards from the sides to ensure a tight roll of rice. As you pinch and roll, you will notice that the rice will take on a square shape. Keep pinching and rolling until you have a tight rice bar with a square profile. Repeat with the rest of the rice.

Wet a sharp or serrated knife and cut the rice bars into cubes. The width shouldn't be more than the width of your finger. Wet the blade each time you cut, or the rice will stick to the knife and break away from the bar. Wash the knife if required to remove the stickiness. Repeat with all bars until you have about 24 cubes.

Heat the oil for frying in a suitable pan. Fry the rice squares in small numbers to ensure they don't stick together.

Fry each side till golden brown and crispy. Repeat with all squares, and drain excess oil on a kitchen towel.

Cut the avocado in half and remove the seeds. Score the avocado into small dice and then scoop it out of the skin into a bowl. Lightly mash the avocado. Please do the same for the other half, but don't mash it. This will give some texture to the smashed avocado.
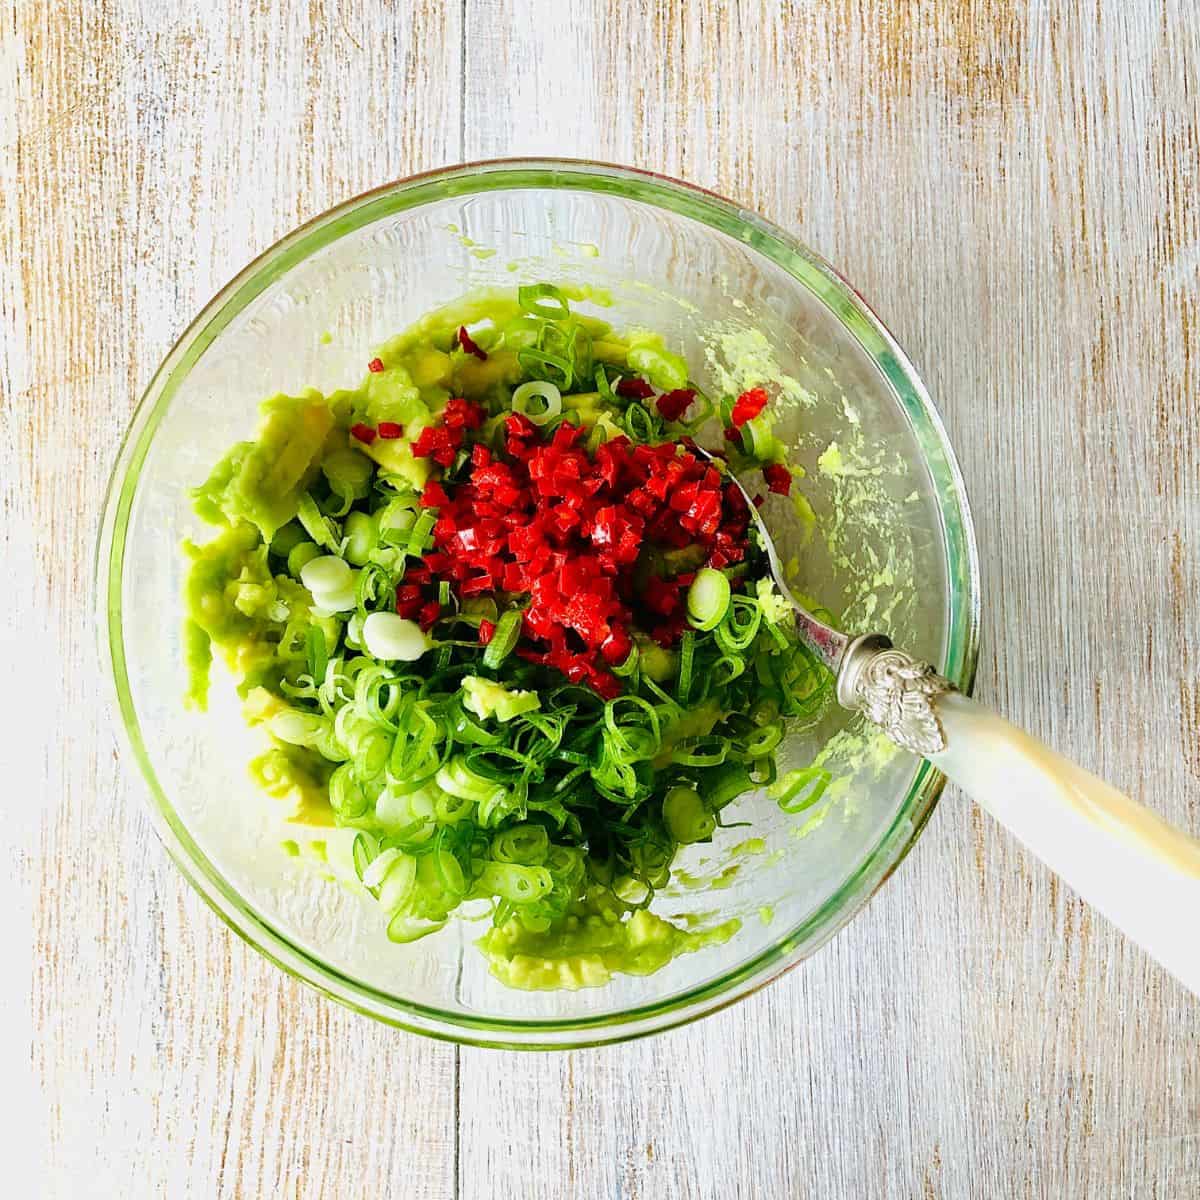
Add the finely chopped spring onion and red chilli, soy sauce and lime juice and give it a good mix and refrigerate

To assemble your crunchy sushi bites, to each square add some of the avocado mixture. Garnish as desired with either chilli or spring onion. Serve immediately.
How-To Video
Here is a video guide to making crunchy sushi topped with smashed avocado.
Substitutions
You can use any sticky rice for this recipe.
Replace the spring onions with red onions if you don't have spring onions.
Variations
This crunchy sushi is a perfect platform for any topping. You can use a topping of your choice.
Equipment
A Sushi mat is essential for this recipe; however, if you do not have one, you can try with parchment paper or a silicon mat.
Storage
Store the crunchy sushi in an airtight container for up to three days, and reheat in an oven before use.
You can keep the avocado mix in the fridge for a day or two in an airtight container. Cover the mixture with parchment paper as well to ensure no air touches the surface. Any air will cause discolouration of the avocado mix.
Top tip
Do not be tempted to open the pot lid while the rice is cooking; it will result in undercooked rice.
Wet your hands each time handling cooked sushi rice.
Use a sharp, wet knife to cut the rice rolls into small squares.
📖 Recipe

Crunchy Sushi With Avocado
Equipment
- Sushi mat
Ingredients
- 200 gms Japanese rice
- 200 ml Water
- 1 nos Avocado
- 30 gms Spring onion 2 nos
- 1 nos Red chilli
- ½ Lime Juice
- 1 teaspoon Soy sauce
- 500 ml Oil for frying
Sushi vinegar
- 45 gms Rice vinegar
- 35 gms Castor sugar
- 5 gms Salt
Instructions
Sushi Vinegar
- Add the rice vinegar, sugar, and salt to a pot and simmer until the sugar and salt dissolve.
- Once done, remove from heat and set aside to cool.
Crunchy Sushi
- Soak and wash the rice several times until the water runs clear. Drain the water and transfer the rice into a pot. Add 200 ml water, cover, and cook over high heat for five minutes. Then reduce the heat to simmer for five minutes. Finally, turn the heat off and leave the rice to cook in its steam for another five minutes.
- While the rice is cooking, de-seed and finely chop red chilli.
- Finely chop the spring onions.
- Cut the avocado in half and remove the seed. Score the avocado into small dice, then scoop it out of the skin into a bowl. Lightly mash the avocado. Please do the same for the other half, but don't mash it. This will leave some texture in the smashed avocado.
- Add chopped spring onion, red chilli, soy sauce and lime juice and give it a good mix and refrigerate.
- Once the rice has cooked and steamed, remove it from the pot into a large bowl to stop it from cooking further. Add the sushi vinegar and mix well to combine. Set aside to cool.
- Prepare a bowl of water and a sushi mat for rolling.
- Wet your hands, scoop up rice, shape it into a ball, and transfer it to the centre of the sushi mat. Roll the end of the mat (the end nearest to you ) to cover the rice. Now pull the rolled-over mat towards you using both hands to form a bar of sushi rice with a square profile. Use an equal amount of pressure while pulling. Press the rice inwards from the sides to ensure a tight rice bar. As you pinch and roll, the rice will take on a slightly square shape. Keep pinching and rolling until you have a tight bar of rice. Repeat with the rest of the rice.
- Wet a sharp or serrated knife and cut the rice rolls into cubes, the width shouldn't be more than the width of your finger. Wet the knife each time you cut or else the rice will stick to the knife and break off sushi rice bar. Wash the knife if required to remove the stickiness. Repeat with all the rice bars until you have about 24 cubes.
- Heat the oil in a large pot or pan for deep frying.
- Fry the rice cubes a few at a time to ensure they don't stick together. Fry each side until golden brown and crispy. Repeat with all squares, and drain excess oil onto a kitchen towel.
- To assemble, add a spoonful of avocado mix to each cube. Garnish as desired with either chilli or spring onion. Serve immediately.
Food Safety
- Wash your hands regularly while preparing, handling and cooking food.
- Wipe down countertops and high-contact points regularly.
- If you cook meat and fish, do not use the same utensils on cooked food that previously touched raw meat. Use separate chopping boards for meat and fish. Wash your chopping boards immediately after use.
- Thoroughly cook food to a minimum temperature of 165 °F (74 °C).
- Don't leave food at room temperature for extended periods (more than 2 hours).
- Store food correctly.


Leave a Reply